
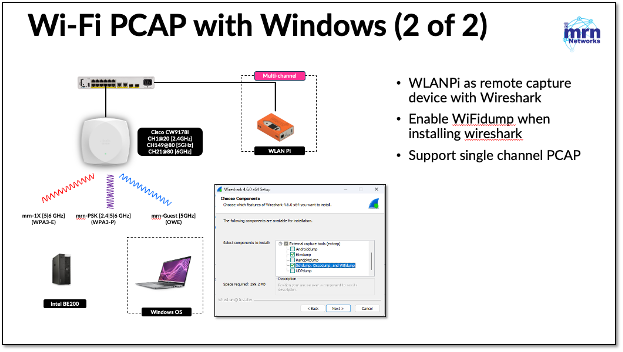
In the previous post, we explored how to capture Wi-Fi packets on Windows using CommView software. In this post, we’ll look at another method—capturing Wi-Fi packets on Windows with the help of a WLANPi device.
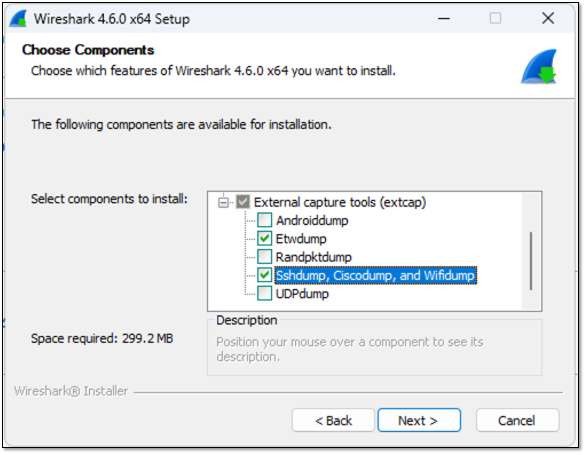
To enable remote Wi-Fi packet capture, make sure that when you install Wireshark on your Windows computer, you select the checkbox for ‘sshdump, ciscodump, and wifidump,’ as shown in the image below.
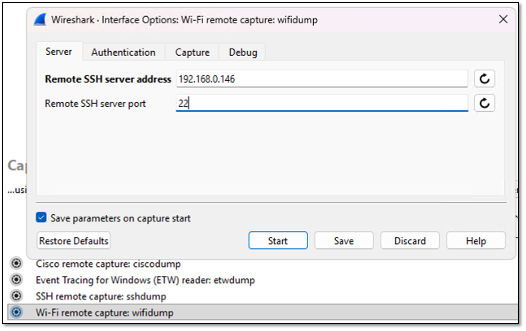
Once you open Wireshark and go to Capture Options (or use the shortcut Ctrl + K), you’ll see several options. Click on ‘Wi-Fi Remote Capture: wifidump’, then select the cogwheel icon to enter the WLANPi details. In the Server tab, you enter the IP address of WLANPi and SSH port 22.
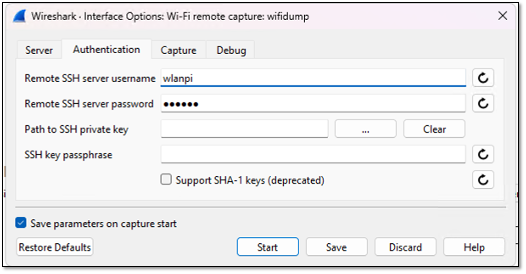
In the Authentication tab, you enter the WLANPi credentials.
In the Capture tab, enter the WLAN interface and channel number you want to capture, and specify the channel width.

Once you hit ‘Start,’ you should see the packet capture in progress. Below is an example capture taken while my phone was connecting to an 802.1X SSID on Channel 21 in the 6 GHz band. Note that it’s difficult to perform a multi-channel capture using this method, even if you have multiple adapters connected to your WLANPi.

As you can see, it’s straightforward to capture packets using WLANPi as a remote device.
